RFID
ALAT DAN BAHAN
 |
| × | 1 | |||
| × | 1 | ||||
| × | 1 | ||||
 |
| × | 1 | |||
| × | 1 | ||||
| × | 3 | ||||
 |
| × | 3 | |||
 |
| × | 1 | |||
| × | 1 |
TENTANG
Jika Anda belajar tentang dasar-dasar RFID dan antarmuka RFID dengan Arduino di mana kami menciptakan pembaca RFID Arduino dan kunci pintu Arduino RFID. Dalam posting ini, Anda akan belajar tentang bagaimana membangun kunci pintu berbasis RFID dan Keypad menggunakan Arduino. Untuk membuka pintu, pengguna harus terlebih dahulu memindai tag yang tepat dan kemudian ia harus memasukkan kata sandi yang benar. Saat memindai tag yang salah atau memasukkan kata sandi yang salah, sistem akan menolak akses.
Ini adalah artikel kedua dari seri RFID Arduino. Semua artikel seri RFID Arduino adalah sebagai berikut
1. Dasar-dasar RFID dan Modul RFID berinteraksi dengan Arduino
2. Kunci Pintu berbasis RFID dan Keypad menggunakan Arduino
3. Sistem Kunci dan Peringatan Pintu berbasis RFID dan Keypad menggunakan Arduino
4. Sistem Kontrol Akses berbasis RFID menggunakan Arduino
5. Kontrol Akses dan Sistem Peringatan berbasis RFID menggunakan Arduino
6. Kontrol Akses berbasis RFID dan Keypad menggunakan Arduino
7. Sistem Kontrol Akses dan Peringatan Berbasis RFID dan Keypad menggunakan Arduino
Diagram Sirkuit dan Penjelasan
Pembaca RFID berkomunikasi dengan Arduino melalui protokol SPI dan papan Arduino yang berbeda memiliki pin SPI yang berbeda.
Untuk menguji apakah pembaca RFID berfungsi dengan baik atau tidak, unggah "dumpinfo" dari contoh di Arduino dan lihat apakah itu menunjukkan informasi tag pada monitor seri atau tidak. Jika Anda baru mengenal RFID, ikuti tutorial ini | Dasar-dasar RFID dan antarmuka modul RFID dengan Arduino
LCD I2C berkomunikasi dengan Arduino melalui protokol I2C. Papan Arduino yang berbeda memiliki pin I2C yang berbeda. Pin I2C pada Arduino Uno dan Arduino Nano adalah A4, A5.
Selanjutnya sambungkan keypad dengan Arduino. Papan tombol 4X4 memiliki 8 koneksi tetapi kami tidak memerlukan kolom tombol terakhir. Kami hanya membutuhkan angka untuk kata sandi. Jadi kami tidak akan menggunakan pin keypad terakhir untuk kolom keempat. Anda juga dapat menggunakan tombol 4X3 dan bukan tombol 4X4.
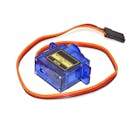
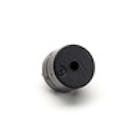
Selanjutnya hubungkan Led, servo dan buzzer dengan Arduino seperti yang ditunjukkan pada diagram di bawah ini.
Pada akhirnya, hubungkan sumber daya ke Arduino. Saya telah menggunakan tiga 18650 sel. Kita bisa memberikan 6 hingga 12V ke Arduino melalui jack barel.

Code
The initial password is ‘1234’.
Change the tag’s UID in the below line of code with your tag’s UID.
String tagUID = “29 B9 ED 23”;
The complete code for RFID and Keypad based door lock using Arduino is as follows
// Include required libraries
#include <MFRC522.h>
#include <LiquidCrystal_I2C.h>
#include <Keypad.h>
#include <Servo.h>
#include <SPI.h>
// Create instances
LiquidCrystal_I2C lcd(0x27, 16, 2);
MFRC522 mfrc522(10, 9); // MFRC522 mfrc522(SS_PIN, RST_PIN)
Servo sg90;
// Initialize Pins for led's, servo and buzzer
// Blue LED is connected to 5V
constexpr uint8_t greenLed = 7;
constexpr uint8_t redLed = 6;
constexpr uint8_t servoPin = 8;
constexpr uint8_t buzzerPin = 5;
char initial_password[4] = {'1', '2', '3', '4'};  // Variable to store initial password
String tagUID = "29 B9 ED 23";  // String to store UID of tag. Change it with your tag's UID
char password[4];   // Variable to store users password
boolean RFIDMode = true; // boolean to change modes
char key_pressed = 0; // Variable to store incoming keys
uint8_t i = 0;  // Variable used for counter
// defining how many rows and columns our keypad have
const byte rows = 4;
const byte columns = 4;
// Keypad pin map
char hexaKeys[rows][columns] = {
  {'1', '2', '3', 'A'},
  {'4', '5', '6', 'B'},
  {'7', '8', '9', 'C'},
  {'*', '0', '#', 'D'}
};
// Initializing pins for keypad
byte row_pins[rows] = {A0, A1, A2, A3};
byte column_pins[columns] = {2, 1, 0};
// Create instance for keypad
Keypad keypad_key = Keypad( makeKeymap(hexaKeys), row_pins, column_pins, rows, columns);
void setup() {
  // Arduino Pin configuration
  pinMode(buzzerPin, OUTPUT);
  pinMode(redLed, OUTPUT);
  pinMode(greenLed, OUTPUT);
  sg90.attach(servoPin);  //Declare pin 8 for servo
  sg90.write(0); // Set initial position at 90 degrees
  lcd.begin();   // LCD screen
  lcd.backlight();
  SPI.begin();      // Init SPI bus
  mfrc522.PCD_Init();   // Init MFRC522
  lcd.clear(); // Clear LCD screen
}
void loop() {
  // System will first look for mode
  if (RFIDMode == true) {
    lcd.setCursor(0, 0);
    lcd.print("   Door Lock");
    lcd.setCursor(0, 1);
    lcd.print(" Scan Your Tag ");
    // Look for new cards
    if ( ! mfrc522.PICC_IsNewCardPresent()) {
      return;
    }
    // Select one of the cards
    if ( ! mfrc522.PICC_ReadCardSerial()) {
      return;
    }
    //Reading from the card
    String tag = "";
    for (byte j = 0; j < mfrc522.uid.size; j++)
    {
      tag.concat(String(mfrc522.uid.uidByte[j] < 0x10 ? " 0" : " "));
      tag.concat(String(mfrc522.uid.uidByte[j], HEX));
    }
    tag.toUpperCase();
    //Checking the card
    if (tag.substring(1) == tagUID)
    {
      // If UID of tag is matched.
      lcd.clear();
      lcd.print("Tag Matched");
      digitalWrite(greenLed, HIGH);
      delay(3000);
      digitalWrite(greenLed, LOW);
      lcd.clear();
      lcd.print("Enter Password:");
      lcd.setCursor(0, 1);
      RFIDMode = false; // Make RFID mode false
    }
    else
    {
      // If UID of tag is not matched.
      lcd.clear();
      lcd.setCursor(0, 0);
      lcd.print("Wrong Tag Shown");
      lcd.setCursor(0, 1);
      lcd.print("Access Denied");
      digitalWrite(buzzerPin, HIGH);
      digitalWrite(redLed, HIGH);
      delay(3000);
      digitalWrite(buzzerPin, LOW);
      digitalWrite(redLed, LOW);
      lcd.clear();
    }
  }
  // If RFID mode is false, it will look for keys from keypad
  if (RFIDMode == false) {
    key_pressed = keypad_key.getKey(); // Storing keys
    if (key_pressed)
    {
      password[i++] = key_pressed; // Storing in password variable
      lcd.print("*");
    }
    if (i == 4) // If 4 keys are completed
    {
      delay(200);
      if (!(strncmp(password, initial_password, 4))) // If password is matched
      {
        lcd.clear();
        lcd.print("diterima");
        sg90.write(90); // Door Opened
        digitalWrite(greenLed, HIGH);
        delay(3000);
        digitalWrite(greenLed, LOW);
        sg90.write(0); // Door Closed
        lcd.clear();
        i = 0;
        RFIDMode = true; // Make RFID mode true
      }
      else    // If password is not matched
      {
        lcd.clear();
        lcd.print("Wrong Password");
        digitalWrite(buzzerPin, HIGH);
        digitalWrite(redLed, HIGH);
        delay(3000);
        digitalWrite(buzzerPin, LOW);
        digitalWrite(redLed, LOW);
        lcd.clear();
        i = 0;
        RFIDMode = true;  // Make RFID mode true
      }
    }
  }
}
Video
CODE
SCHEMATICS
RFID and Keypad Based Door Lock using Arduino


Wisata Wuhannya kak... Lagi promo nihh
ReplyDeleteSiap
Deletedi rapihin lagi..
ReplyDelete